Build an Interchain Dapp with Axelar - Part 2
In the first part of this tutorial, you wrote a Solidity-based smart contract and deployed it on the Ethereum and Polygon blockchains. Now it’s time to build a decentralized application frontend that will link to that contract with NextJS - a ReactJS framework that uses server-side rendering. This frontend will allow a user to send a transaction and view it on Axelarscan.
Prerequisites
You will need a MetaMask wallet connected to the Ethereum and Polygon testnets and enough ETH, MATIC, and aUSDC to complete transactions with gas fees. If you do not have funds, you can get some at the Ethereum Goerli (ETH), Polygon Mumbai (MATIC), and Axelar Discord faucets.
- WAGMI is installed:
npm i wagmi
Clone the Dapp Starter Code
Clone the moralis-axelar starter code from GitHub. You should be able to see the following folders:
contract— Contains a file for theGMPDistributioncontract’s application binary interface (ABI).pages— Contains code for wallet authentication, etc.src— Contains the code that sends ERC-20 tokens from one blockchain to another via theGMPDistributioncontract.
Set Up Dependencies
To wire up the smart contract to the frontend, you’ll need the contract’s application binary interface (ABI), along with its deployed addresses on both Ethereum and Polygon, from part one of this tutorial.
Go back to the Gmp-Distribution repository from part one and copy your deployed contract’s ABI array from the artifacts/contracts/GMPDistribution.sol/GMPDistribution.json directory. Then switch back to the moralis-axelar repository and replace [YOUR_ABI_HERE] in contract/abi.json.
Set up the required environment variables (MORALIS_API_KEY) to properly integrate with Moralis services. Create a new project on the Moralis website to generate these keys, copy the values in Project > Settings > API Keys, and then add them to a new .env.local file in the root folder.
The file should look like this:
MORALIS_API_KEY = "<your API key here>"
NEXTAUTH_URL='http://localhost:3000'
Install the dependencies by running npm i in the terminal.
Review ERC20Balances.tsx
The [src/components/templates/balances/ERC20/ERC20Balances.tsx](https://github.com/benjamin852/axl-moralis/blob/starter-code/src/components/templates/balances/ERC20/ERC20Balances.tsx) file in the starter code contains the following:
availableChains
availableChains is an array of chains that the token can be sent between. Currently, this only consists of the Ethereum and Polygon blockchains. Avalanche is not supported.
const availableChains = [
    { chainName: 'ethereum-2', chainId: 5, distributionContractAddr: 'YOUR_DEPLOYED_CONTRACT_ADDRESS' },
    { chainName: 'Polygon', chainId: 80001,
];
The available chains are broken down by their name, chainId, and distributionContractAddr. YOUR_DEPLOYED_CONTRACT_ADDRESS must be changed to the address of the deployed GMPDistribution contract.
useEvmWalletTokenBalances
useEvmWalletTokenBalances is a function that comes with the imported Moralis package that queries all of a user’s ERC-20 tokens for a specific wallet address at a given chain ID.
Run the Starter Code
To run the starter code, type npm run dev in the terminal window. The output should contain a link to localhost:
ready - started server on 0.0.0.0:3000, url: http://localhost:3000`, open localhost
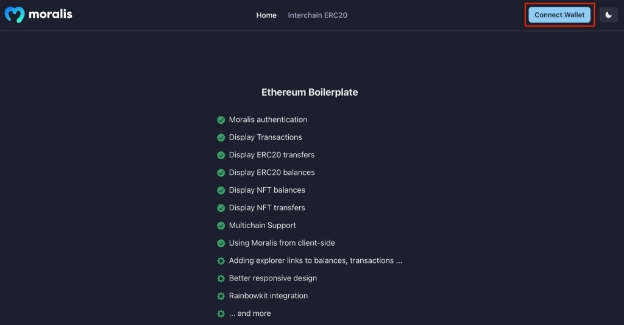
Follow that link and click on the Connect Wallet button. Make sure that your MetaMask wallet is connected on the Ethereum or Polygon testnets.
Once your wallet is connected, navigate to the Interchain ERC20 tab.
You should see a table that can send ERC-20 tokens and query ERC-20 balances in your connected wallet, along with a section containing the following:
- A “transfer to” column with a drop-down menu for selecting the chain to transfer a token to.
- An input field for the token’s receiving address.
- An input field for the amount of tokens to send.

Import WAGMI to Interact with the Contract
Now you can interact with the contract you deployed in part one. This involves writing data to the blockchain, so you’ll need the contract’s ABI and the WAGMI package, which offers react hooks for Web3 development.
Add the following to the import statements in the ERC20Balances.tsx file:
import { useNetwork, usePrepareContractWrite, useContractWrite } from 'wagmi';
import abi from '../../../../../contract/abi.json';
Parse the Frontend Data
Before you can use the WAGMI hooks, you must correctly parse the frontend data. Currently, updateReceiverAddrs(), updateTransferAmount(), and updateDestChain() update the table’s UI state. Let’s implement an additional useEffect() hook to parse out all the unnecessary data from the table.
First, implement three new useState hooks to store the data that will be submitted to the contract.
const [submittedDestChain, setSubmittedDestChain] = useState<DestChain[]>([]);
const [submittedToken, setSubmittedToken] = useState<SelectedToken[]>([]);
const [submittedReceiverAddrs, setSubmittedReceiverAddrs] = useState<string[]>([]);
Now you can parse the data in a new useEffect() hook. The code in the hook will filter out the empty table data, leaving only the information relevant to the token you’re sending.
// Filter out empty table data.
useEffect(() => {
  const filteredDestChain = selectedDestChain.filter((item) => !(item.chainName === '' && item.chainId === 0));
  setSubmittedDestChain(filteredDestChain);

  const filteredTokens = selectedToken.filter((item) => !(item === undefined));
  setSubmittedToken(filteredTokens);

  const filteredReceiverAddrs = receiverAddrs
    .filter((item) => !(item === ''))
    .flatMap((item) => item.split(','))
    .map((address) => address.trim());

  setSubmittedReceiverAddrs(filteredReceiverAddrs);
}, [selectedDestChain, selectedToken, receiverAddrs]);
Write to the Contract
Now that the data is correctly parsed, you can begin to interact with the appropriate WAGMI hooks.
The first WAGMI hook you’ll use is [usePrepareContractWrite()](https://wagmi.sh/react/prepare-hooks/usePrepareContractWrite), which prepares the data to be sent to the blockchain. It takes the following parameters:
address– Contract address.abi– Contract ABI.chainId– Chain ID of the source chain.functionName– The signature of the function to call.args– The arguments to pass to a function call.value– One native token (1e18, or 1,000,000,000,000,000,000) to pay the cost of the interchain transaction. You can use theparseEther()function in theetherspackage to eliminate the need to write 18 zeroes.
You will also use the parseUnits() function to pass in the amount of tokens you’re sending from chain to chain. Since you’ll be sending aUSDC, you can use this to parse six decimal points and pass in one as an aUSDC amount instead of 1,000,000 from the frontend.
Add usePrepareContractWrite() to the code, along with a new import statement:
import { parseUnits, parseEther} from 'ethers/lib/utils.js';

  const { config } = usePrepareContractWrite({
    address: sourceChainContractAddr,
    abi: abi,
    chainId: chain?.id,
    functionName: 'sendToMany(string,string,address[],string,uint256)',
    args: [
        submittedDestChain[0]?.chainName,
        submittedDestChain[0]?.distributionContractAddr,
        submittedReceiverAddrs,
        submittedToken[0]?.tokenSymbol,
        parseUnits((submittedToken[0]?.transferAmount || 0).toString(), 6).toString(),
    ],
    overrides: {
        value: parseEther('1'),
    },
  })
Now that you’ve obtained the config object from the usePrepareContractWrite() hook, you can pass it into the [useContractWrite()](https://wagmi.sh/react/hooks/useContractWrite) hook.
const { data: txData, isSuccess, write } = useContractWrite(config);
Let’s set the hook to trigger as soon as the user taps the Transfer button in ERC20Balances.tsx. Change the console.log('send erc20 token1') statement to a write?.() statement:
<Button
    isDisabled={token?.symbol != 'aUSDC'}
    onClick={() => {
        write?.()
    }}>
Transfer
</Button>
Now you can run the app, authenticate a wallet, and tap the Transfer button to send an interchain transaction with Axelar from the Moralis-based frontend.
Add a Button That Gets an Axelarscan Link
To improve the user experience, let’s add a second button labeled View Transaction to the frontend. The button will trigger a viewTx() function that opens a link to Axelarscan as soon as a transaction is sent. Add the View Transaction button at the top of the VStack right above the menu:
<Button onClick={() => viewTx()}>View Transaction</Button>
The viewTx() function will open a Axelarscan URL that corresponds to the hash received from the useContractWrite() hook. After opening this page, it resets the frontend to a fresh state.
const viewTx = () => {
   const url = 'https://testnet.axelarscan.io/gmp/${txData?.hash}';
   if (url) window.open(url, '_blank');
   setSelectedDestChain([]);
   setReceiverAddrs([]);
   setSelectedToken([]);
   setSubmittedDestChain([]);
   setSubmittedToken([]);
   setSubmittedReceiverAddrs([]);
 };
Update the User Interface to Toggle Between States
Let’s update the user interface to only show the View Transaction button if a transaction has been sent. Add useRef to the import statement so it can be used in a hook.
import { useState, useEffect, useRef } from 'react';
Now you can set a hook for the key that references a specific token:
const keyRef = useRef<number | null>(null);
Next, set the keyRef to the key of the token being sent when the user clicks the Transfer button:
<Button
  isDisabled={token?.symbol != 'aUSDC'}
  onClick={() => {
    write?.();
    keyRef.current = key;
  }}
>
  Transfer
</Button>
Add another useEffect hook to the code and set the pendingTx bool of the corresponding key to true. Make sure that this hook is under the useContractWrite hook so that isSuccess is available:
useEffect(() => {
    if (isSuccess) {
      setSelectedToken((prevSelectedTokens) => {
        const updatedSelectedTokens = [...prevSelectedTokens];
        const key = keyRef.current !== null ? keyRef.current : undefined;
        if (key !== undefined) {
          const { pendingTx } = updatedSelectedTokens[key];
          if (!pendingTx) {
            updatedSelectedTokens[key] = {
              ...updatedSelectedTokens[key],
              pendingTx: true,
            };
          }
          return updatedSelectedTokens;
        } else {
          return prevSelectedTokens;
        }
      });
    }
  }, [isSuccess]);
This hook is called immediately after the transaction is submitted to the blockchain. It waits for the user to sign the transaction, and if the transaction is successful, it will set the pendingTx of the corresponding token’s key in the table of tokens to true, thus showing the View Transaction button:
// Show the View Transaction button if a transaction
// has been successful
selectedToken[key]?.pendingTx ? ( <Button onClick={() => view()}>View Transaction</Button> ) : (<><Menu>.....</Menu></>)
The completed VStack should now look like the following:
<VStack>
{selectedToken[key]?.pendingTx ? (
    <Button onClick={() => viewTx()}>View Transaction</Button>
) : (
    <>
    <Menu>
        {({ isOpen }) => (
        <>
            <MenuButton isActive={isOpen} as={Button} size="s" rightIcon={<ChevronDownIcon />}>
            {selectedDestChain[key]?.chainName == ''
                ? 'Select Chain'
                : selectedDestChain[key]?.chainName}
            </MenuButton>
            <MenuList>
            <MenuItem onClick={() => updateDestChain(key, '', 0, '')}>Clear</MenuItem>
            {availableChains.map((availableChain) =>
                availableChain.chainId !== chain?.id ? (
                <MenuItem
                    key={availableChain.chainId}
                    onClick={() =>
                    updateDestChain(
                        key,
                        availableChain.chainName,
                        availableChain.chainId,
                        availableChain.distributionContractAddr,
                    )
                    }
                >
                    {availableChain.chainName}
                </MenuItem>
                ) : null,
            )}
            </MenuList>
        </>
        )}
    </Menu>
    <Input
        placeholder="Receiving Address(es)"
        size="sm"
        value={receiverAddrs[key] || ''}
        onChange={(e) => updateReceiverAddrs(key, e.target.value)}
    />
    <Input
        placeholder="Transfer Amount"
        size="sm"
        value={selectedToken[key]?.transferAmount || ''}
        onChange={(e) => {
        const value = e.target.value;
        if (key !== undefined && token?.symbol && token?.contractAddress) {
            updateTransferAmount(
            key,
            token.symbol,
            token.contractAddress.checksum,
            parseFloat(value),
            false,
            );
        }
        }}
    />
    <Button
        isDisabled={token?.symbol != 'aUSDC'}
        onClick={() => {
        write?.();
        keyRef.current = key;
        }}
    >
        Transfer
    </Button>
    </>
)}
</VStack>
Check the Completed Code
To test if this works, run the code, go to the Interchain ERC-20 tab. Set the destination chain to ethereum-2, the Receiving Address to your MetaMask wallet address, the Transfer Amount to 1, and press Transfer. After signing the MetaMask transaction, you should see the View Transaction button that will show your live transaction on Etherscan.

Congratulations! You’ve now successfully built an Axelar interchain application that interacts with a Moralis frontend. The complete code can be found on GitHub for reference purposes.
See Also
Building this kind of dapp is just the tip of the iceberg.
Check out the following to continue learning about Axelar and its interchain possibilities: