How to Authenticate Users with Particle Network
What is Particle Network?
Check the Particle Network documentation website to get more information.
Particle Network is the Intent-Centric, Modular Access Layer of Web3. With Particle's Smart Wallet-as-a-Service, developers can curate unparalleled user experience through modular and customizable EOA/AA embedded wallet components. By utilizing MPC-TSS for key management, Particle can streamline onboarding via familiar Web2 accounts—such as Google accounts, email addresses, and phone numbers.
Prerequisites
Next.js Dapp with MetaMask Sign-In
Before you begin this tutorial, make sure you have set up a Next.js decentralized application (Dapp) that includes MetaMask sign-in functionality. If you haven't integrated MetaMask sign-in yet, refer to the guide How to Authenticate Users with MetaMask.
Install Dependencies
To prepare for this tutorial, you'll need to install the following dependencies for Particle Connect:
@particle-network/connect-react-ui: This package provides React UI components for Particle Connect. You can install it using npm or yarn.
npm install @particle-network/connect-react-uior
yarn add @particle-network/connect-react-ui@particle-network/connect: This package is essential for integrating Particle Connect into your Dapp. Install it using npm or yarn.
npm install @particle-network/connector
yarn add @particle-network/connect@particle-network/chains: This optional dependency is leveraged for handling blockchain chains within Particle Connect. You can install it using npm or yarn.
npm install @particle-network/chainsor
yarn add @particle-network/chains
With these prerequisites organized, you'll be fully prepared to smoothly integrate Particle Connect into your Next.js Dapp.
Configure Particle Connect
Open the pages/signin.jsx file and restructure your code as shown below. This code utilizes Particle Connect's components and hooks for handling the connection process and wallet interactions.
import { useRouter } from 'next/router';
import { useEffect } from 'react';
import { useAccount, ConnectButton, useConnectKit, ModalProvider } from '@particle-network/connect-react-ui';
import { useAuthRequestChallengeEvm } from '@moralisweb3/next';
import { signIn } from 'next-auth/react';
import { Ethereum } from '@particle-network/chains';
import { evmWallets } from '@particle-network/connect';
import '@particle-network/connect-react-ui/dist/index.css';
export default function SignIn() {
const { requestChallengeAsync } = useAuthRequestChallengeEvm();
const { push } = useRouter();
const account = useAccount();
const connect = useConnectKit();
useEffect(() => {
if (account) {
(async () => {
const { message } = await requestChallengeAsync({
address: account,
chainId: '0x1',
});
const signature = await connect.particle.evm.personalSign(`0x${Buffer.from(message).toString('hex')}`); // Conversion to hex, then signing with connected Particle account (whether that be through Particle Auth or otherwise)
const result = await signIn("moralis-auth", {
message,
signature,
redirect: false,
callbackUrl: '/user',
});
if (result && result.url) {
push(result.url);
}
})();
}
}, [account]);
return (
<ModalProvider
options={{ // Options for Particle Auth; the projectId, clientKey, and appId can be retrieved from https://dashboard.particle.network/
projectId: process.env.PARTICLE_PROJECT_ID,
clientKey: process.env.PARTICLE_CLIENT_KEY,
appId: process.env.PARTICLE_APP_ID,
chains: [Ethereum],
wallets: evmWallets({ showQrModal: true, projectId: process.env.WALLETCONNECT_PROJECT_ID }), // WalletConnect for Web3 wallet connections (non Particle Auth)
}}
>
<div>
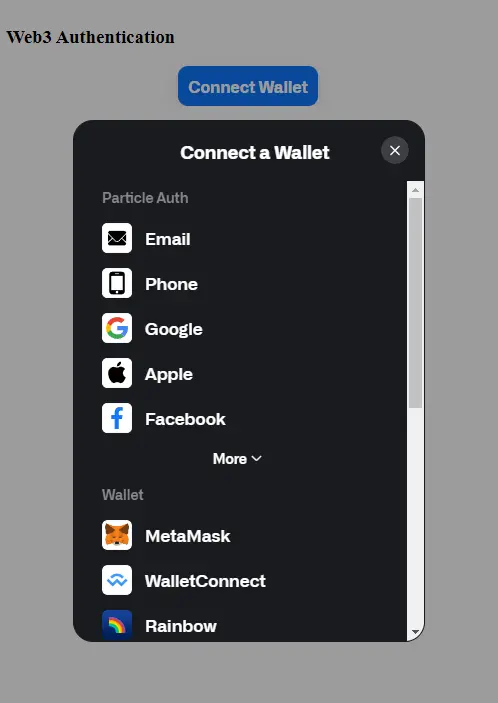
<h3>Web3 Authentication</h3>
<ConnectButton />
</div>
</ModalProvider>
);
}
Test Particle Connect
To test the authentication process with Particle Connect, follow these steps:
Visit Sign-In Page: Go to
http://localhost:3000/signin.Connect Wallet: Click the "Connect Wallet" button to initiate the login process. You can choose to log in through Particle Auth or a supported Web3 (EVM) wallet.

Select Sign-In Method: Choose your preferred sign-in method from the options provided.
Successful Authentication: After successful authentication, you will be automatically redirected to the
/userpage.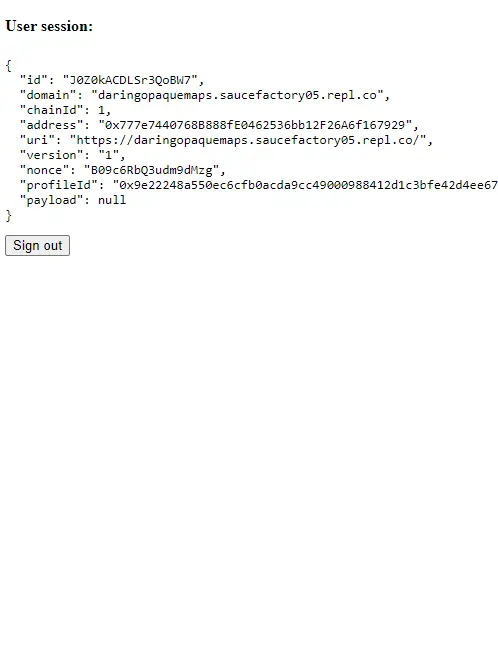
Test User Session: Visit
http://localhost:3000/userto test the functionality of the user session:- When a user is authenticated, their information will be displayed on the page.
- If a user is not authenticated, they will be redirected to the
/signinpage. - Even after refreshing the page, the user's information will still be displayed. (Explanation: After Web3 wallet authentication, the
next-authlibrary creates a session cookie with an encrypted [JWT] containing session information, stored in the user's browser.)