Getting Started with Moralis Nodes
Moralis simplifies the process of accessing blockchain data from nodes across various blockchains. This guide will walk you through the steps to set up your Moralis RPC node and get started quickly.
Step 1: Create a Moralis Account
To begin, you’ll need a Moralis account. Sign up for a free account by heading to the Moralis Dashboard.
Step 2: Access Your Node URL
After signing up, the next step is to generate your unique Node URL. Follow these steps:
- Log in to your Moralis Dashboard.
- From the sidebar, click on the "Nodes" tab.
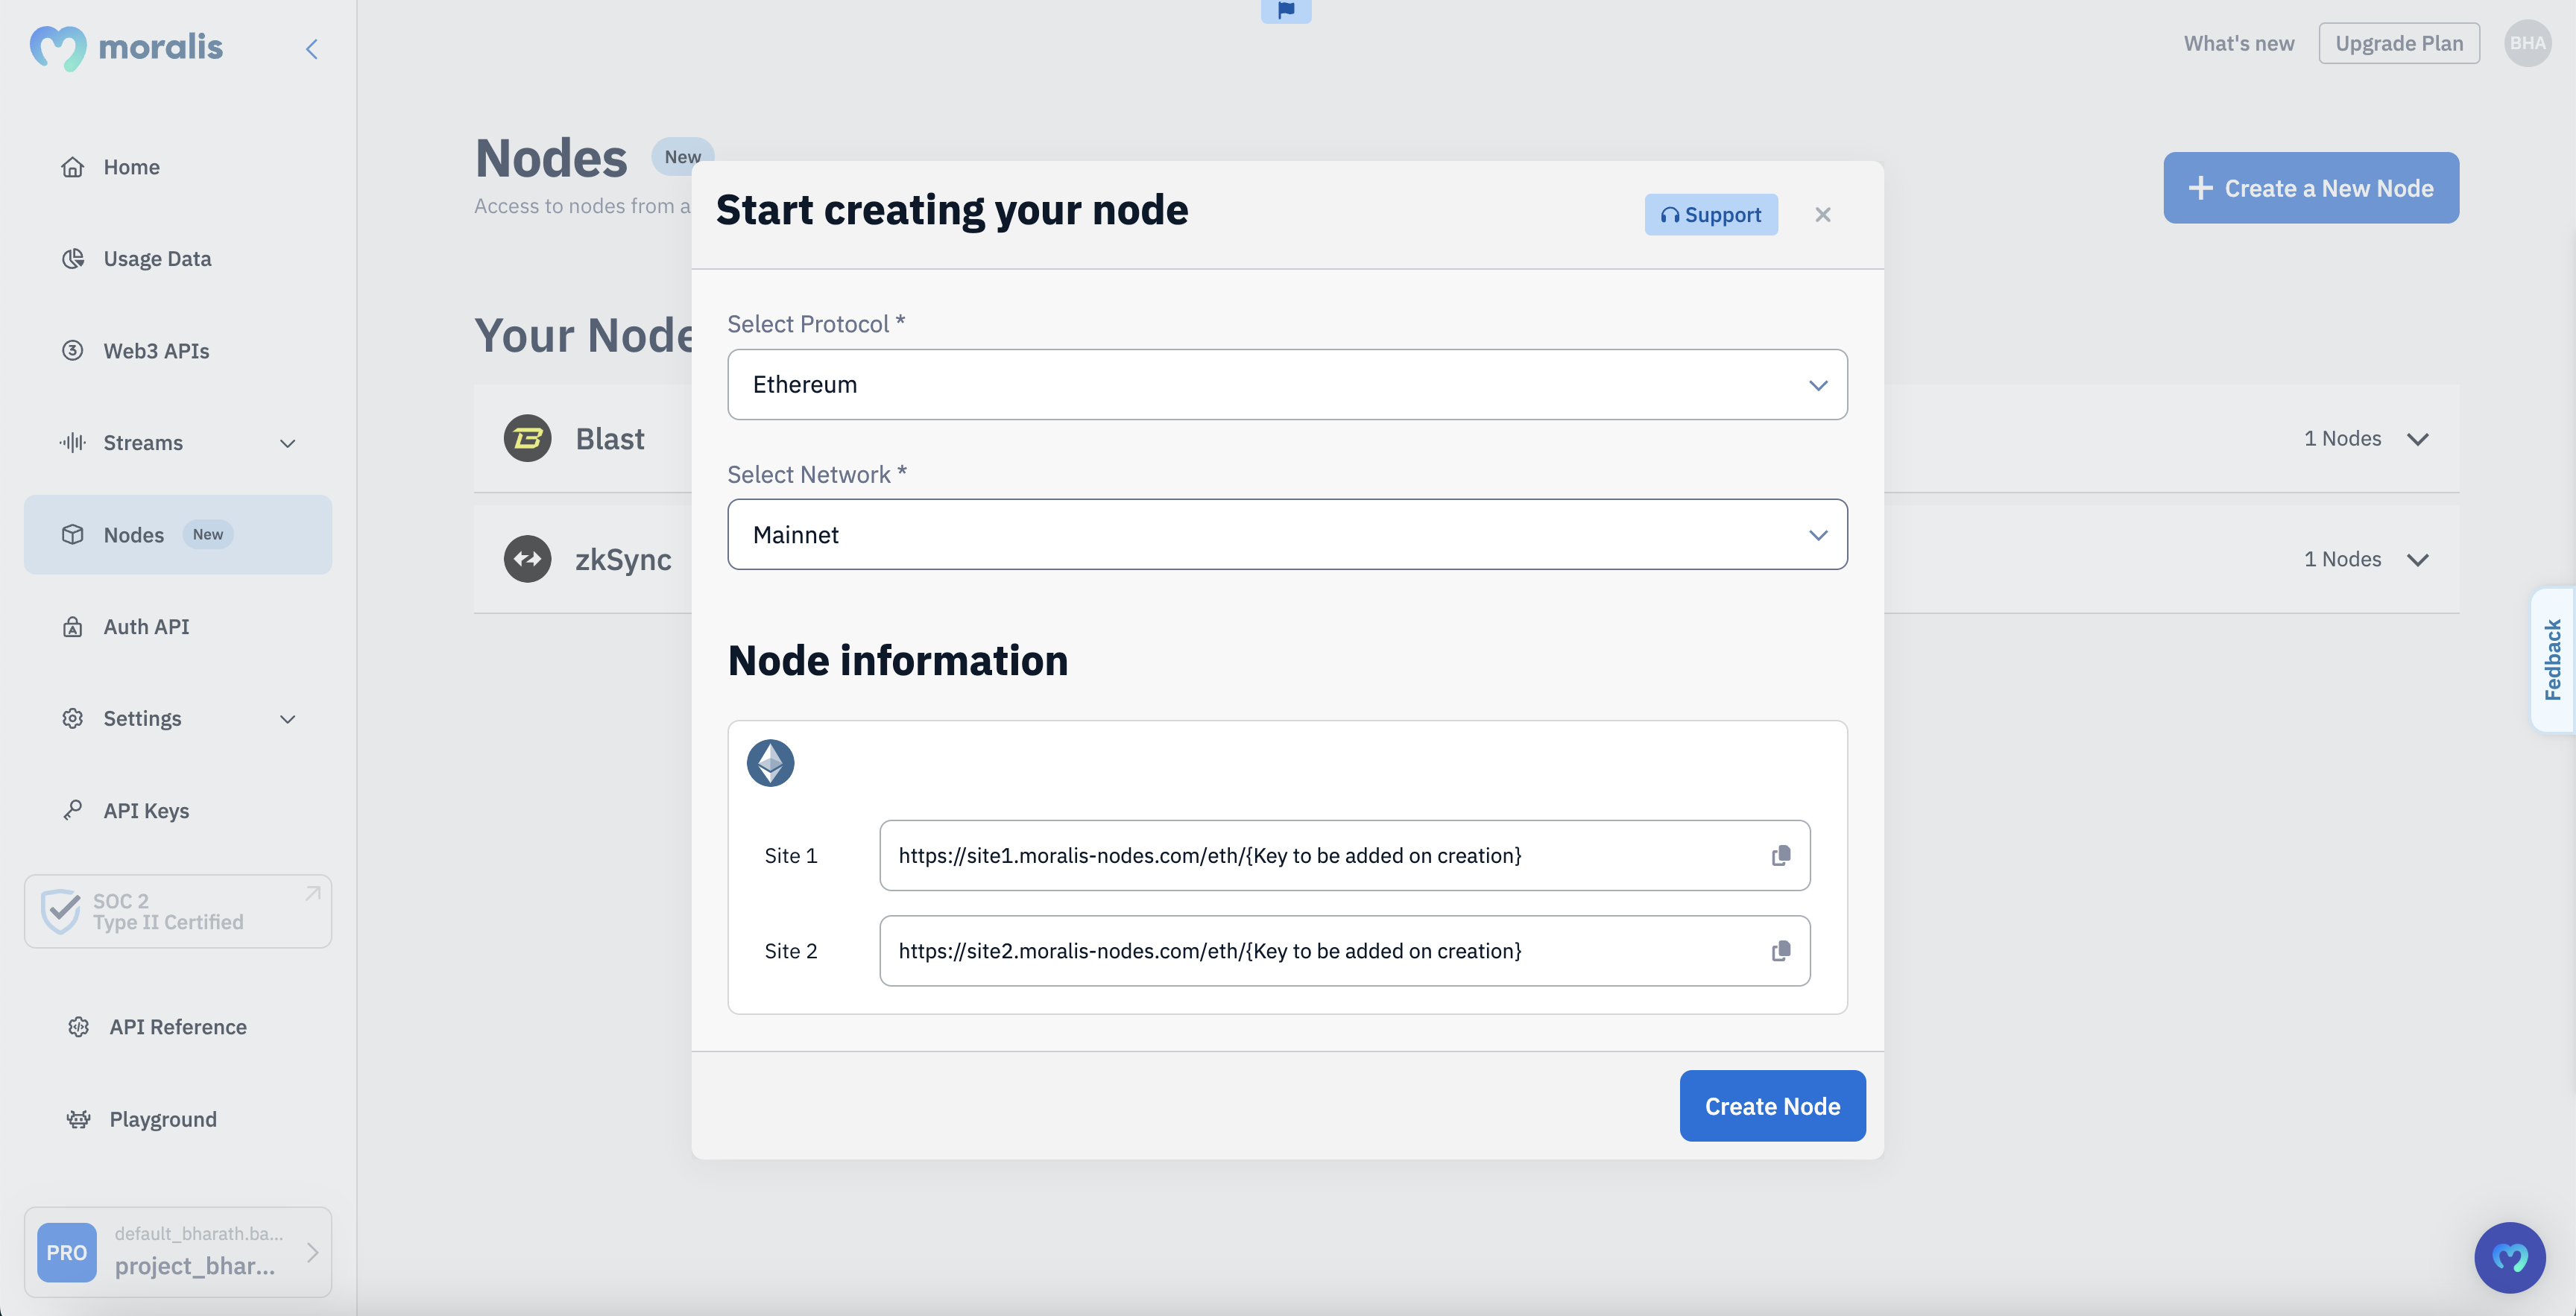
- Select "Create a New Node".
Here, you can choose the blockchain network you want to connect to (e.g., Ethereum, Binance Smart Chain, Polygon) and specify whether you want access to the mainnet or testnet.
Once you’ve selected your network and environment, click "Create Node" to generate your node.
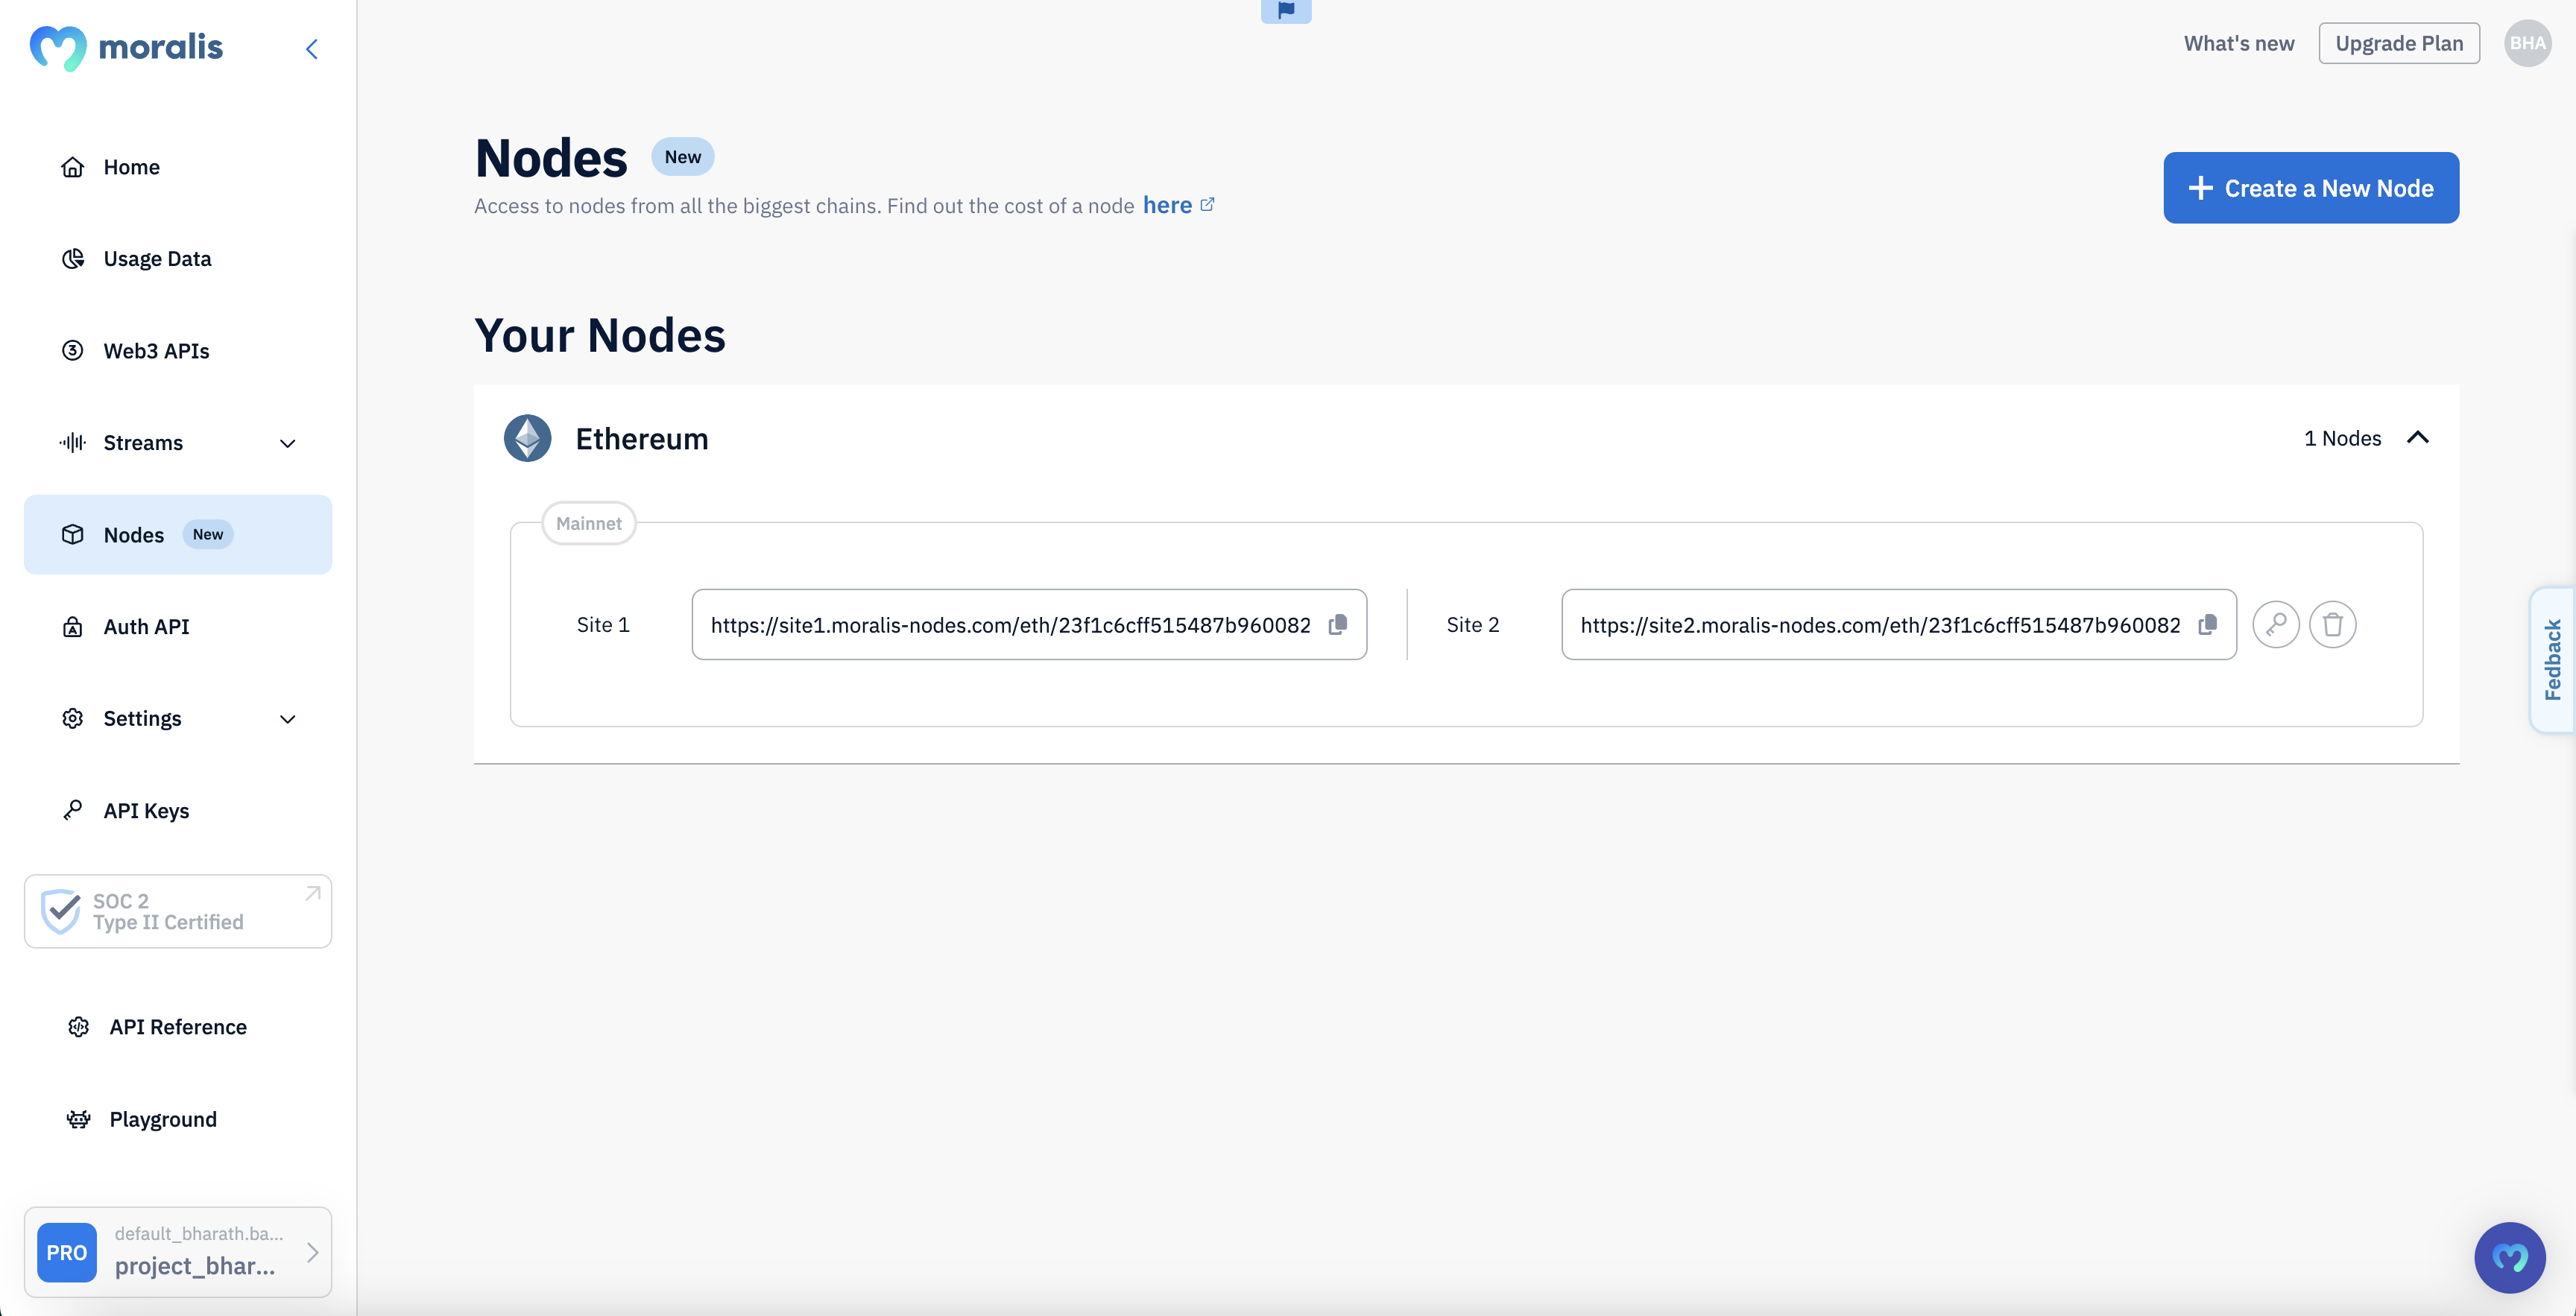
Step 3: Copy Your Node URL
Once your node is created, you will be provided with two URLs—one for site 1 and another for site 2. Both URLs include your Node API Key.
Simply copy one of these URLs. This is your unique Node URL, which you'll use to interact with the blockchain in your application.
Make sure to keep your Node URL safe, as it contains your API key, which is essential for connecting to the blockchain.
Next Steps
Congratulations! You've successfully created your Moralis account and generated your unique Node URL. You’re now ready to start making RPC calls using your node.
To move forward and learn how to make your first RPC call, check out the next guide in the series: Making Your First RPC Call.
Happy coding with Moralis!