How to Authenticate Users with WalletConnect
Before the Start
You can start this tutorial if you already have a NextJS dapp with MetaMask functionality.
Configuring the WalletConnect Connector
- Open the
pages/signin.jsxfile and addWalletConnectConnectoras a connector toconnectAsync(). You should have your Project ID for the WalletConnect configuration and replacexxxwith it in the code below.
import { WalletConnectConnector } from "wagmi/connectors/walletConnect";
import { signIn } from "next-auth/react";
import { useAccount, useConnect, useSignMessage, useDisconnect } from "wagmi";
import { useRouter } from "next/router";
import { useAuthRequestChallengeEvm } from "@moralisweb3/next";

function SignIn() {
  const { connectAsync } = useConnect({
    connector: new WalletConnectConnector({
      options: { projectId: "xxx", showQrModal: true },
    }),
  });
  const { disconnectAsync } = useDisconnect();
  const { isConnected } = useAccount();
  const { signMessageAsync } = useSignMessage();
  const { requestChallengeAsync } = useAuthRequestChallengeEvm();
  const { push } = useRouter();

  const handleAuth = async () => {
    if (isConnected) {
      await disconnectAsync();
    }

    const { account, chain } = await connectAsync();

    const { message } = await requestChallengeAsync({
      address: account,
      chainId: chain.id,
    });

    const signature = await signMessageAsync({ message });

    // redirect user after success authentication to '/user' page
    const { url } = await signIn("moralis-auth", {
      message,
      signature,
      redirect: false,
      callbackUrl: "/user",
    });
    /**
     * instead of using signIn(..., redirect: "/user")
     * we get the url from callback and push it to the router to avoid page refreshing
     */
    push(url);
  };

  return (
    <div>
      <h3>Web3 Authentication</h3>
      <button onClick={handleAuth}>Authenticate via WalletConnect</button>
    </div>
  );
}

export default SignIn;
Testing the WalletConnect Connector
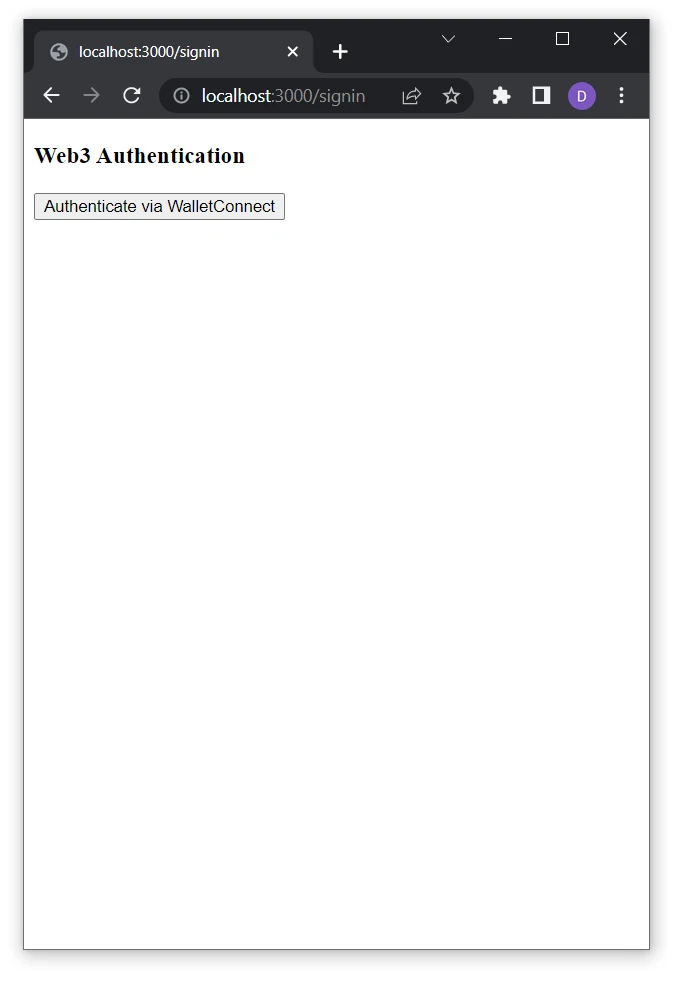
Visit http://localhost:3000/signin to test authentication.
- Click on
Authenticate via WalletConnect:
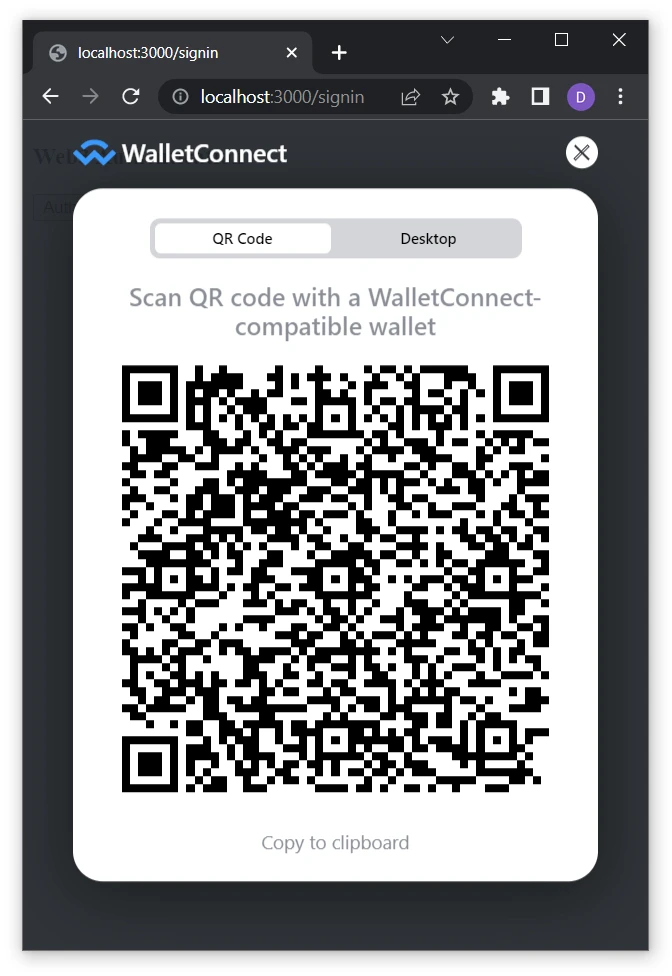
- Scan the QR code with your wallet:
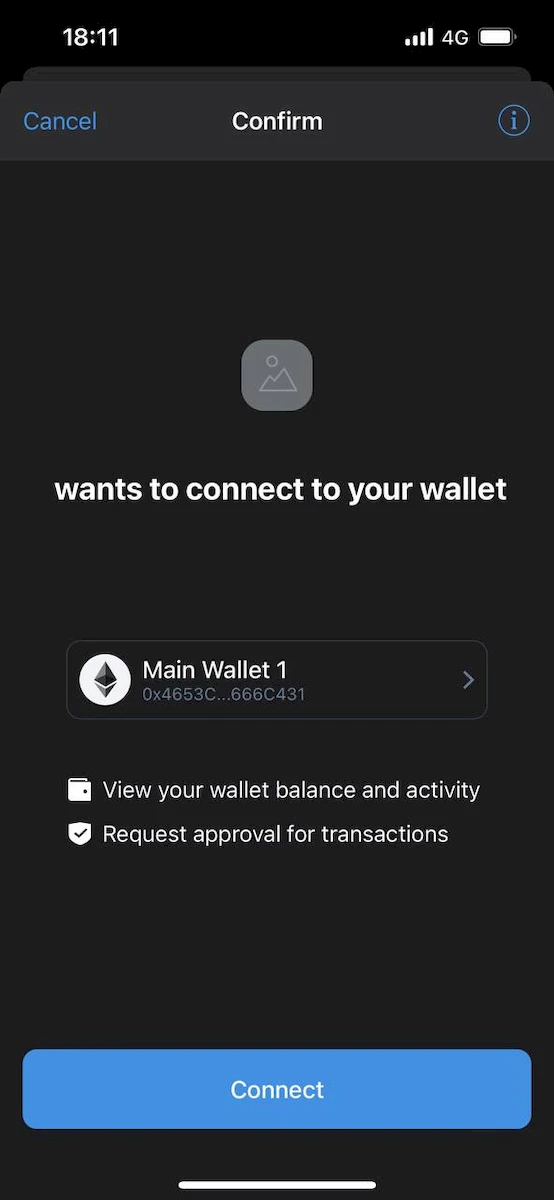
- Connect your wallet:
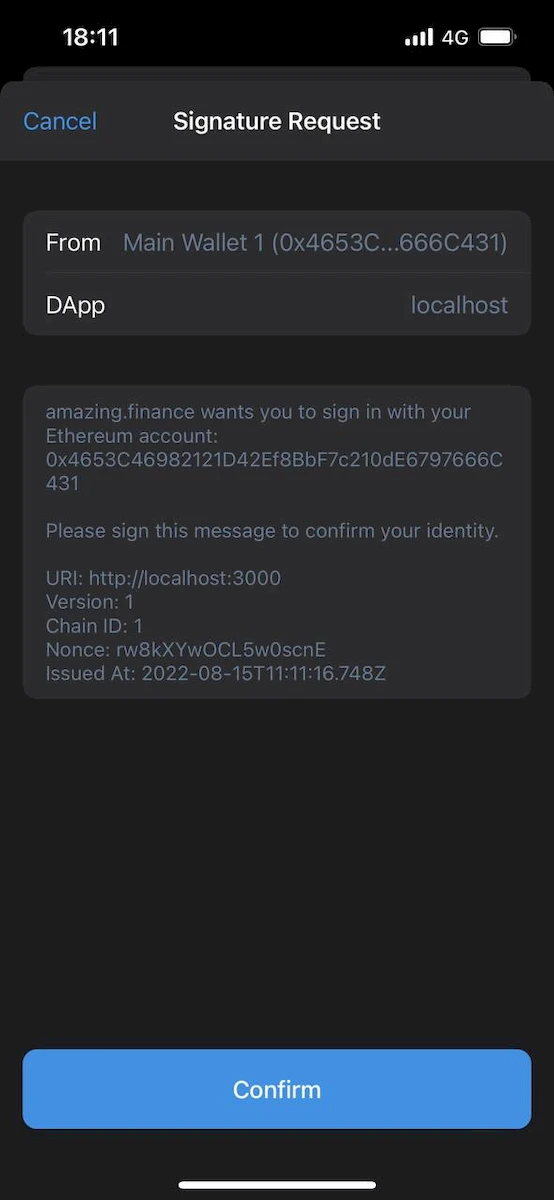
- Sign the message:
- Visit
http://localhost:3000/userto test the user session's functionality:
- When a user is authenticated, we show the user's info on the page.
- When a user is not authenticated, we redirect to the
/signinpage. - When a user is authenticated, we show the user's info on the page, even refreshing after the page. (Explanation: After Web3 wallet authentication, the
next-authlibrary creates a session cookie with an encrypted JWT [JWE] stored inside. It contains session info [such as an address and signed message] in the user's browser.)